
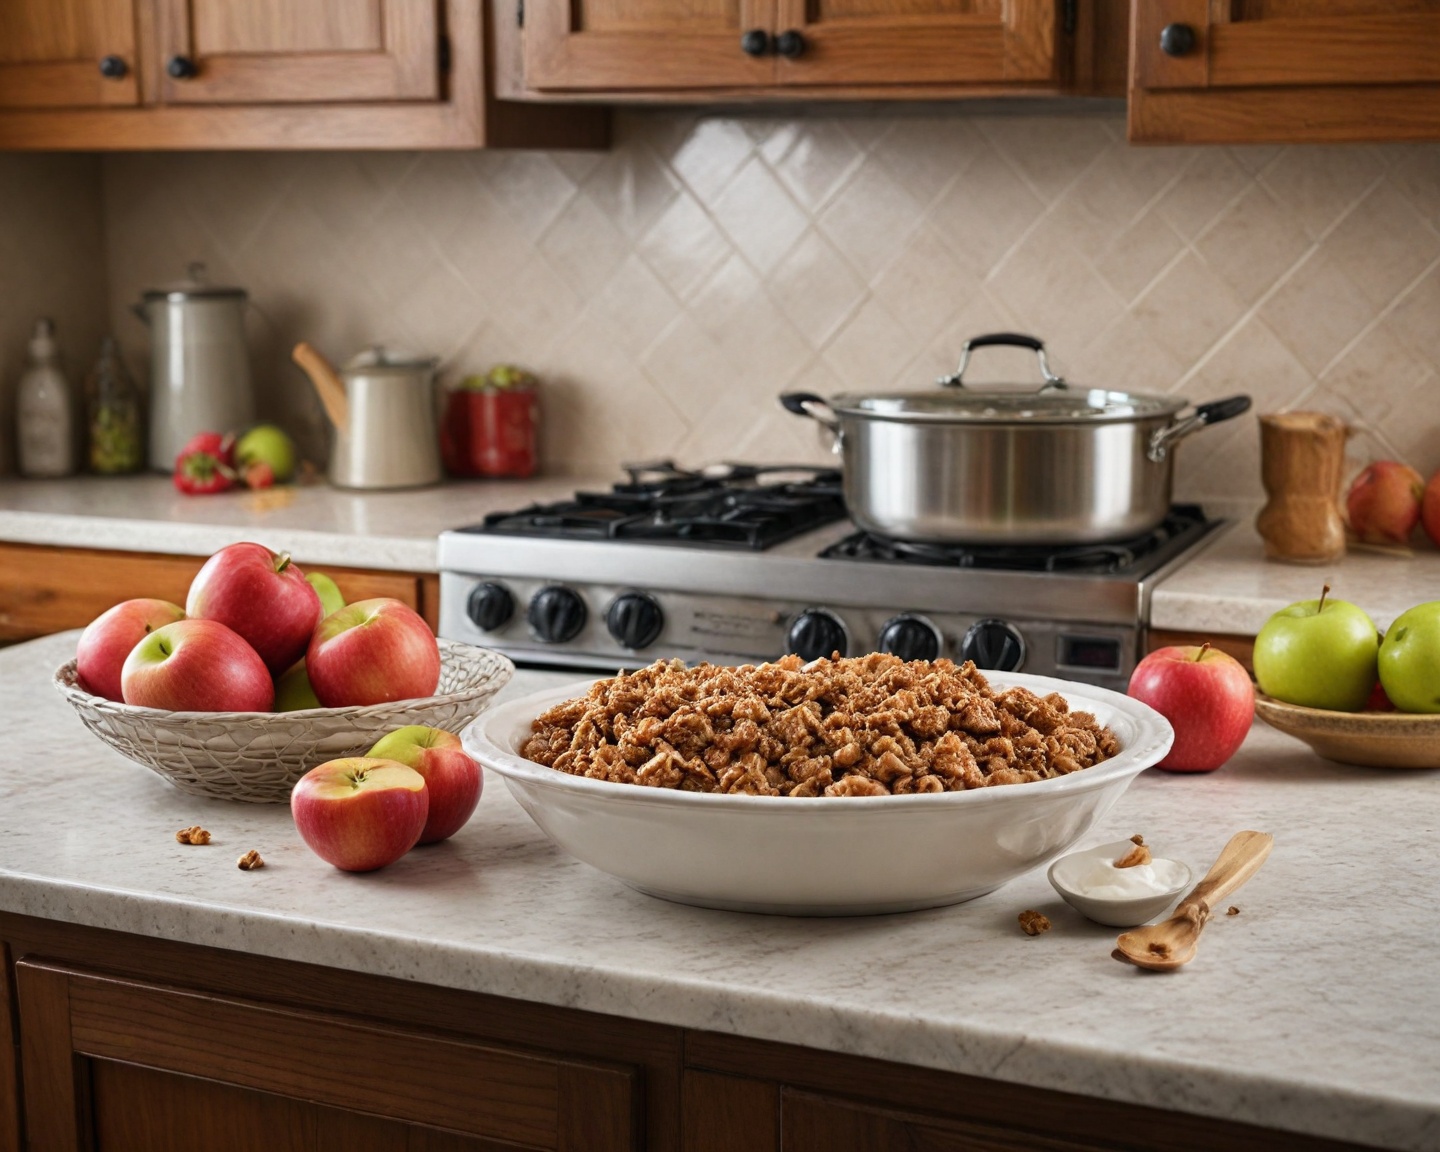
Introduction to Apple Crisp and Its Appeal
Apple crisp is a timeless, delectable dessert that perfectly embodies the flavors of autumn. Its allure lies in its wonderful balance of sweet and tart flavors, combined with a satisfying crunchy topping that complements the warm, spiced apples beneath. While it might seem humble compared to other desserts, apple crisp holds a cherished spot on many tables, often evoking nostalgia and warmth with every bite.
There’s something inherently comforting about apple crisp. Perhaps it’s the simplicity of ingredients or the way the aroma of cinnamon and baked apples fills the house. This dish is perfect for those who treasure the transition of seasons, as it’s particularly popular when apples are at their prime. Despite its straightforward preparation, apple crisp delivers a complex flavor profile that rivals more sophisticated desserts.
Moreover, apple crisp is incredibly versatile. It can be dressed up for a dinner party or dressed down for a cozy family gathering. It pairs beautifully with vanilla ice cream, whipped cream, or a dollop of crème fraîche, making it a favorite in both casual and formal settings. The flexibility in both its presentation and accompanying flavors means that variations of apple crisp can cater to almost any taste preferences or dietary restrictions.
As we delve into the world of apple crisp, not only will we discover how to make apple crisp in the most delicious way possible, but we’ll also explore the essential components that make this dessert a beloved classic. From choosing the right apples to perfecting the crisp topping, this guide will provide you with all the tools necessary to create an unforgettable apple crisp.
Choosing the Best Apples for Apple Crisp
Selecting the right apples is crucial when learning how to make apple crisp. The ideal apples for this dessert should balance sweetness and tartness while maintaining their shape during baking. Here are some top choices to consider:
-
Granny Smith: Known for their tartness and firm texture, Granny Smith apples are a popular choice for apple crisp. They hold up well during baking and provide a nice contrast to the sweet topping.
-
Honeycrisp: These apples are sweet with a hint of tartness and have a juicy, crisp texture. They’re wonderful in apple crisp as they retain their firmness without becoming mushy.
-
Fuji: Fuji apples are very sweet and slightly less tart but work excellently in apple crisp if you prefer a milder, sweeter filling.
-
Braeburn: Braeburn apples boast a spiced flavor that enhances the cinnamon and nutmeg in the crisp. They also maintain their shape when baked.
| Apple Type | Sweetness | Tartness | Baking Texture |
|---|---|---|---|
| Granny Smith | Low | High | Firm |
| Honeycrisp | Medium | Medium | Juicy and Crisp |
| Fuji | High | Low | Firm |
| Braeburn | Medium | Medium | Maintains Shape |
When choosing apples, consider mixing different types to achieve a more complex flavor profile. This blend will ensure a delightful balance and the best taste experience.
Essential Ingredients Required
A classic apple crisp recipe is defined by its simplicity, relying on a handful of ingredients to create that perfect harmony of flavors and textures. Here’s what you will need:
For the Apple Filling:
- Apples: The star ingredient. Plan for around six to eight medium-sized apples.
- Sugar: Granulated sugar sweetens the filling and helps draw out the juices from the apples.
- Spices: Cinnamon and nutmeg are traditional spices, providing warmth and depth. Feel free to adjust based on preference.
- Lemon Juice: A splash of lemon juice enhances the tartness and prevents the apples from browning.
For the Crisp Topping:
- Flour: All-purpose flour forms the base of the crumbly topping.
- Oats: Rolled oats add a delicious, chewy texture. Avoid quick oats for the best result.
- Brown Sugar: The molasses in brown sugar adds richness to the topping.
- Butter: Cold, unsalted butter is cut into the topping ingredients to create a crumbly texture.
- Salt: Just a pinch to balance the sweetness.
These ingredients together create a wonderful symphony of flavors and textures. The key is in the combination, where each component plays a critical role in crafting the overall sensory experience of a perfectly baked apple crisp.
Step-by-Step Guide to Preparing the Apple Filling
Creating the apple filling is a straightforward process, but it sets the foundation for the entire dessert. Follow these steps for optimal results:
-
Peel and Slice the Apples: Begin by peeling your chosen apples. They should be sliced into even pieces to ensure uniform cooking. Aim for slices that are about ¼ inch thick.
-
Mix the Ingredients: In a large mixing bowl, combine the apple slices with sugar, spices, and lemon juice. Use a spoon or your hands to mix everything together, ensuring that the apples are evenly coated.
-
Layer for Even Cooking: Once mixed, spread the apple mixture evenly in your baking dish, ensuring an even layer to promote even cooking. This will help each piece retain its texture and flavor.
This preparation method ensures that your apples cook evenly and develop a delightful flavor during baking. It’s a step that, while simple, sets the crisp up for a delicious end product.
How to Make the Perfect Crisp Topping
The topping of an apple crisp is what separates a mediocre dessert from a memorable one. A well-executed topping should be golden, crisp, and have just the right amount of sweetness. Here’s how to make it:
-
Combine Dry Ingredients: In a bowl, mix together flour, oats, brown sugar, and a pinch of salt. Use a whisk or fork to combine thoroughly.
-
Incorporate the Butter: Cut cold butter into small pieces and add them to the dry mixture. Using a pastry cutter or your fingers, work the butter into the mixture until it resembles coarse crumbs. The key here is to ensure that the butter is well incorporated without melting it.
-
Check Consistency: The mixture should clump together when pressed but easily crumble. At this stage, you can adjust the balance of ingredients if necessary, maybe adding more oats or sugar to taste.
As you perfect the topping, consider adding chopped nuts like pecans or walnuts for extra crunch and flavor, or a sprinkle of cinnamon for added warmth. The topping should complement rather than overpower the apples.
Baking Instructions for Optimal Taste and Texture
Once both your apple filling and crisp topping are prepared, it’s time to bring it all together through the baking process. Follow these instructions for optimal results:
-
Preheat Oven: Start by preheating your oven to 350°F (175°C). This temperature ensures the topping will become golden brown while allowing the apples to cook through.
-
Assemble the Crisp: Evenly spread the crisp topping over the apple mixture in your baking dish. Make sure the apples are completely covered for uniform cooking.
-
Bake: Place the crisp in the oven and bake for 45-50 minutes, or until the topping is golden and the apple filling is bubbling. If the top browns too quickly, cover it lightly with aluminum foil to avoid burning.
The reward for your patience will be a steaming dish of perfectly baked apple crisp. The smell alone will have you eagerly anticipating your first bite, and the buttery, crunchy topping combined with the tender, flavorful apples will complete the experience.
Tips for Variations and Serving Suggestions
While a traditional apple crisp is delightful, there are countless ways to put a personal spin on the recipe:
Variations:
- Fruit Mix-Ins: Add fruits like cranberries, raspberries, or pears for an interesting twist.
- Spice Adjustments: Try adding cardamom or cloves for a different spice profile.
- Nut Additions: Chopped nuts like almonds or pecans can add both flavor and texture to the topping.
Serving Suggestions:
- With Ice Cream: A scoop of vanilla ice cream on warm apple crisp is a classic pairing that enhances the taste.
- With Whipped Cream: Lightly sweetened whipped cream adds an airy contrast.
- For Breakfast: Serve it with yogurt for a sweet breakfast treat.
Experiment with these ideas to find a combination that resonates with your taste. The possibilities are nearly endless, making each apple crisp unique and special in its own way.
Common Mistakes to Avoid
Avoiding certain pitfalls is key to ensuring your apple crisp turns out perfect every time. Here are common mistakes and how to steer clear of them:
-
Using the Wrong Apples: Make sure to choose baking apples that hold their shape and offer a good balance of tartness and sweetness.
-
Overcooking the Topping: Keep a watchful eye on the topping to prevent it from burning or becoming too dry.
-
Not Mixing the Ingredients Well: Ensure apples are thoroughly coated with sugar and spices. This helps to develop their flavor.
By avoiding these common errors, you can elevate your apple crisp from a usual dessert to a culinary masterpiece that consistently delights family and friends alike.
Storing and Reheating Leftover Apple Crisp
The beauty of apple crisp is its ability to be enjoyed both fresh and reheated. Here’s how to store and reheat your leftovers properly:
-
Storing: Once cooled, cover the apple crisp with foil or plastic wrap and store it in the refrigerator. It can keep for up to 3-4 days.
-
Reheating: To reheat, preheat your oven to 350°F (175°C). Place the crisp in the oven for about 15-20 minutes or until warmed through. This maintains the topping’s crispness compared to microwaving.
Enjoying leftover crisp keeps the delight alive and allows you to revisit the classic flavors without compromising the quality of the dish.
Conclusion and Invitation to Share Personal Twists on the Recipe
Apple crisp is more than just a dessert; it’s a cherished experience that brings comfort and joy to all who partake. With the right choice of apples, an expertly crafted topping, and a mindful baking process, anyone can create a beautiful, flavorful apple crisp. Whether you stick to tradition or decide to add your own creative touches, you’re sure to enjoy the warm, inviting essence of this dish.
We invite you to share your own personal twists on the apple crisp recipe. How do you make apple crisp unique to you? Have you discovered an exciting variation that your friends and family love? Sharing your stories and modifications encourages a community of apple crisp enthusiasts eager to explore new ideas and savor this classic dessert together.
Frequently Asked Questions
Can I make apple crisp ahead of time?
Yes, you can prepare the apple filling and crisp topping separately, store them in the refrigerator, and assemble it right before baking. This allows you to do most of the work ahead of time and enjoy freshly baked crisp.
What’s the best way to prevent my topping from becoming soggy?
Ensure your topping mixture is well-incorporated, especially the butter. Baking it at the correct temperature and not covering the dish during baking can help the topping stay crisp.
Can I freeze apple crisp?
Yes, apple crisp can be frozen after baking. Allow it to cool completely before wrapping it tightly in plastic wrap or foil. It can be stored for up to three months. Reheat in the oven until warmed through.
Can I make apple crisp gluten-free?
Certainly! Substitute regular all-purpose flour with a gluten-free flour blend. Ensure your oats are certified gluten-free to avoid cross-contamination.
What can I use instead of brown sugar?
You can use granulated sugar or coconut sugar as alternatives. Keep in mind that the flavor will change slightly, as brown sugar adds a hint of molasses flavor that other sugars do not.
Is apple crisp the same as apple crumble?
The terms are often used interchangeably, but traditionally, apple crisp contains oats in its topping while apple crumble does not. Both are delicious and similar in preparation.
Recap
In this article, we’ve covered the essentials of how to make apple crisp, from selecting the best apples to perfecting the crisp topping. We explored variations and serving suggestions to broaden your culinary horizons, highlighted common mistakes to avoid, and provided helpful tips for storing and reheating leftovers. Whether you’re making apple crisp for the first time or the hundredth, these insights will guide you to dessert perfection.
References
- The Science of Good Cooking by America’s Test Kitchen
- The Flavor Bible by Karen Page and Andrew Dornenburg
- “Perfecting Apple Desserts”, Fine Cooking Magazine