
Introduction to Pavlova
Pavlova, a dessert as elegant as its namesake ballerina Anna Pavlova, instantly conjures images of fluffy clouds topped with vibrant fruits. For many, it’s the ultimate show-stopping centerpiece for any dinner party or celebration. Named after the famed Russian dancer, this dessert is notable for its meringue base, which boasts a crisp crust and a soft, light interior. When paired with fresh fruit and whipped cream, it’s a divine fusion of textures and flavors that delights the palate.
Originating from the antipodes, both Australia and New Zealand lay claim to the creation of pavlova, sparking friendly debate over its true birthplace. Despite its contentious origins, what remains universally acknowledged is the dessert’s charm and enduring popularity. Since its creation in the early 20th century, pavlova has been celebrated for its simplicity and the sophisticated balance it strikes between sweetness and acidity.
One of the most compelling aspects of pavlova is its versatility. It lends itself to endless variations—ranging from the classic strawberries and cream to more adventurous toppings like exotic fruit medleys or chocolate shavings. This adaptability ensures its place on dining tables worldwide, evolving with changing culinary trends while maintaining its classic roots.
Making pavlova at home might seem like a daunting task, but it’s easier than you might think. In this guide, we’ll walk you through everything you need to know about how to make pavlova, ensuring you achieve that perfect meringue crunch with a marshmallowy center every time. Whether you’re a seasoned baker or a novice in the kitchen, these tips and techniques will help you master this ultimate dessert.
Essential Ingredients for Pavlova
The magic of pavlova lies in its simplicity, and this is reflected in its short list of essential ingredients. To embark on this culinary journey, you’ll need only a few staple items, many of which are likely already residing in your pantry.
At the heart of a pavlova is the meringue, composed primarily of egg whites. Egg whites are not only essential for the structure but are the main ingredient that brings the pavlova to life. It is important to use fresh eggs for optimal volume and stability. Sugar is another critical component, and superfine sugar is recommended for its ability to dissolve more easily into the egg whites, ensuring a smooth meringue.
Here’s a quick look at the essential ingredients needed to create a classic pavlova:
| Ingredient | Description |
|---|---|
| Egg Whites | Source of structure; ensure no traces of yolk are mixed. |
| Superfine Sugar | Dissolves easily, sweetens, and stabilizes the meringue. |
| Cornstarch | Adds stability to the meringue; prevents weeping. |
| White Vinegar | Helps to stabilize egg whites and maintain volume. |
| Vanilla Extract | Adds flavor and depth to the meringue. |
In addition to these core ingredients, add a touch of cornstarch and white vinegar to ensure the meringue maintains its shape and texture during baking. Vanilla extract is optional, but it provides a lovely aroma and depth of flavor that enhances the dessert’s overall appeal.
Step-by-step Guide to Making the Meringue Base
Creating the perfect pavlova starts with mastering the meringue base. The process is both an art and a science, requiring patience and precision. Follow these steps to achieve that perfect, airy, yet substantial meringue.
-
Preparation is Key: Begin by preheating your oven to a low temperature, around 250°F (120°C). Meringue cooks slowly, allowing it to dry out, rather than bake hard. Line a baking sheet with parchment paper and draw a circle as a guide for the meringue size.
-
Beat the Egg Whites: In a clean and grease-free bowl, start beating the egg whites at medium speed. It’s crucial to ensure there are no traces of yolk in the whites, as fat can prevent the meringue from forming peaks. Once the egg whites are at a soft peak stage, begin adding the sugar a tablespoon at a time. This gradual addition is important for a smooth texture.
-
Additives for Structure: Once all the sugar has been incorporated, add the cornstarch and vinegar. These ingredients will stabilize the meringue and maintain its shape. Finally, fold in a teaspoon of vanilla extract for flavor. The meringue should now have a glossy sheen and form stiff peaks when the beaters are lifted.
With these steps, you lay the foundation for a show-stopping pavlova, ready for baking and the application of your chosen toppings.
Tips for Baking the Perfect Pavlova
Baking the pavlova is a delicate process that can make or break this dessert. With careful attention to detail and a few key strategies, you can ensure that your pavlova turns out perfect each time.
-
Low and Slow: The secret to a successful pavlova lies in its baking method. Opt for a low temperature and a long baking time to ensure a crunchy exterior and a marshmallowy interior. This slow-bake method rewards patience, resulting in the quintessential pavlova texture.
-
Avoid Opening the Oven Door: During the baking process, resist the urge to open the oven door. Sudden changes in temperature can cause the meringue to crack. Maintain a steady temperature and let the pavlova bake without interruption.
-
Cooling Gradually: Once the baking time is up, leave the pavlova in the oven to cool completely. Turn off the oven and prop open the door slightly. This gradual cooling process helps prevent the meringue from collapsing and allows it to set firmly.
By following these tips, you can ensure that your pavlova emerges from the oven looking as splendid as it tastes.
Cooling and Storing the Pavlova
Once baked, cooling and storing your pavlova properly is vital for preserving its texture and taste. Here’s how to navigate this crucial post-bake phase.
-
Complete Cooling: After baking, leave the pavlova in the oven to cool slowly. This process can take several hours, so patience is essential. Avoid transferring it to a cooler environment too quickly, as this can result in cracks or shrinkage.
-
Storage Solutions: Once completely cool, store the pavlova in an airtight container if you’re not serving it immediately. Keeping it in a cool, dry place will maintain its crisp exterior. It can be stored this way for up to two days.
-
Avoid Refrigeration: Moisture is the enemy of pavlova, so avoid refrigerating it. The humid environment in the refrigerator can soften the meringue. Only add toppings right before serving to maintain its structure.
Proper cooling and storage are key to enjoying a pavlova that maintains its alluring texture and flavor balance.
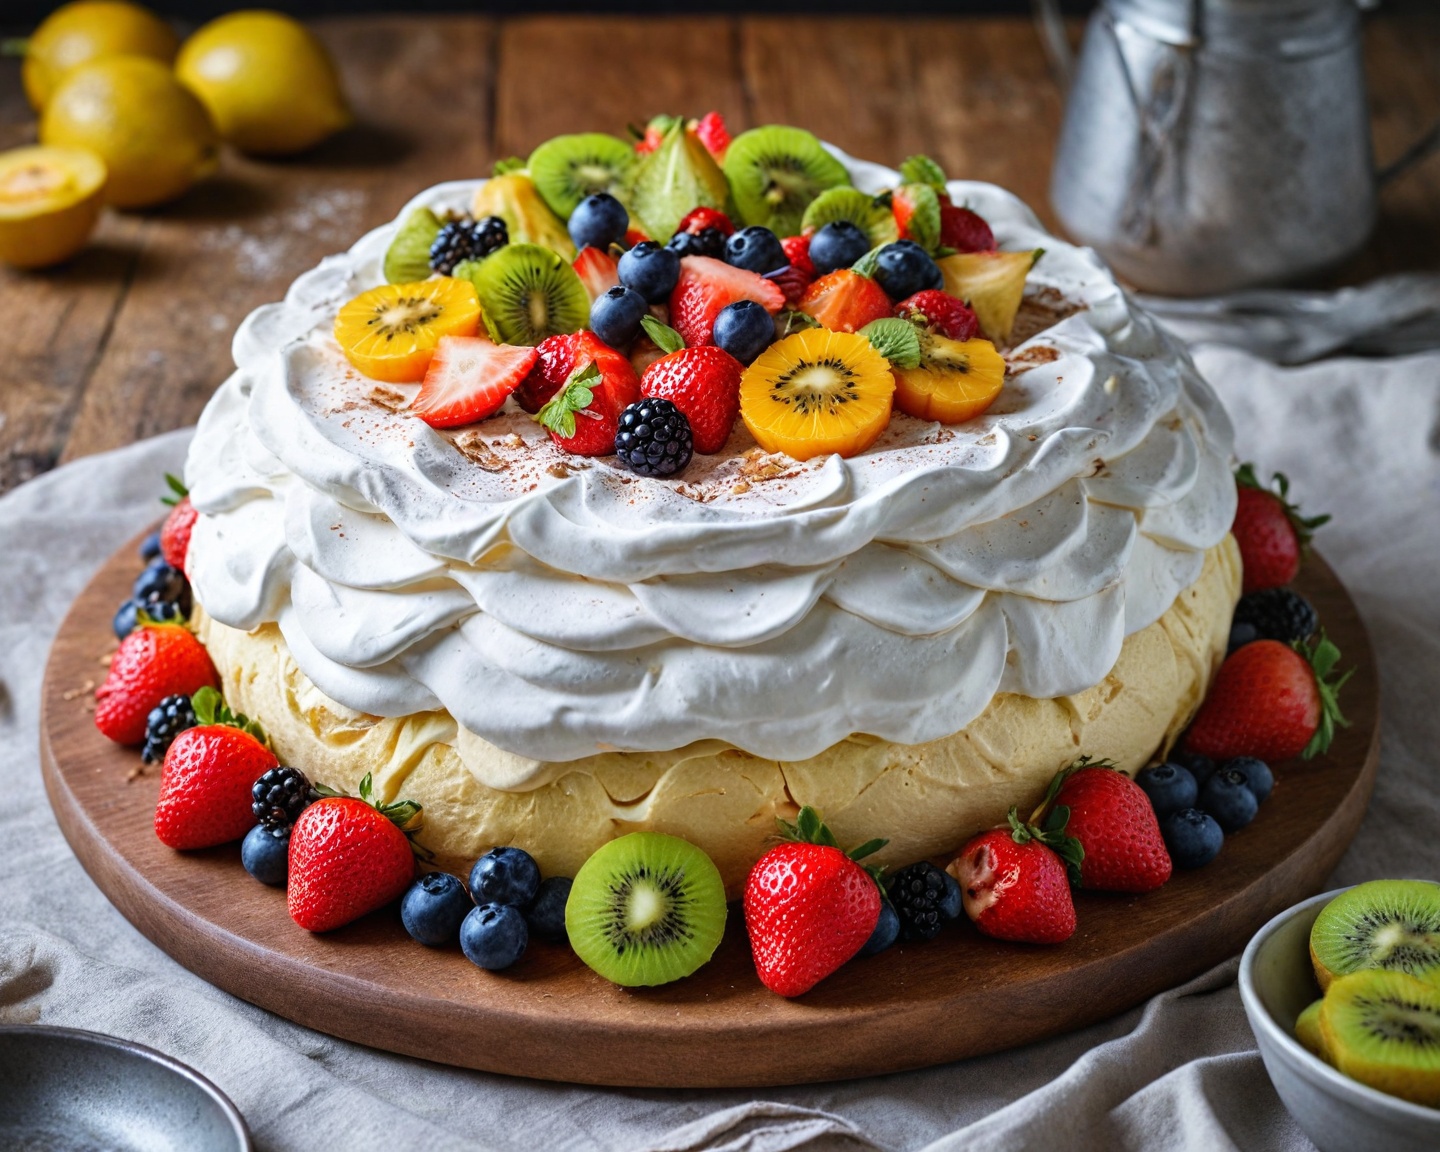
Choosing the Best Toppings for Your Pavlova
Choosing the perfect toppings for your pavlova can elevate it from a simple dessert to a culinary masterpiece. The key is balancing flavors and textures that complement the delicacy of the meringue.
-
Classic Toppings: For a traditional pavlova, nothing beats the combination of whipped cream and fresh fruit. Strawberries, kiwi, and passionfruit offer a colorful and flavorful burst that pairs beautifully with the sugary meringue.
-
Exotic Alternatives: Feel free to experiment with less conventional fruits like mango, pomegranate seeds, or berries. Their tartness can cut through the sweetness, offering a delightful contrast.
-
Creative Additions: For those looking to add a twist, consider drizzling with chocolate sauce or a tangy coulis. Nuts, like toasted pistachios or almonds, can also add texture and complexity.
Carefully selecting your toppings allows you to tailor the pavlova to your personal tastes and the preferences of your guests.
Creative Pavlova Presentation Ideas
Presentation isn’t just about the taste; it’s about the artistry of making a pavlova that impresses your guests at first sight. Consider these creative ideas for showcasing your pavlova.
-
Layered Elegance: Create a layered pavlova by stacking meringue discs with layers of whipped cream and fruit in between. This not only looks stunning but gives each serving a delightful mix of textures.
-
Mini Pavlovas: For individual servings, consider making mini pavlovas. These personal-sized portions are perfect for dinner parties, allowing each guest their own beautifully crafted dessert.
-
Rustic Beauty: If you’re aiming for a more relaxed feel, opt for a rustic presentation. Simply spoon meringue onto the baking sheet for a more organic shape and pile high with toppings, letting ingredients tumble artistically over the sides.
These presentation techniques accentuate the pavlova’s visual appeal and provide a unique dining experience.
Common Mistakes to Avoid When Making Pavlova
Even seasoned bakers can fall into common pitfalls when making pavlova. By knowing what to watch out for, you can ensure your dessert is spot-on every time.
-
Overmixing the Meringue: Beating the egg whites too long can lead to a dry pavlova. The ideal texture should be glossy with stiff peaks, stopping as soon as this consistency is reached.
-
Exposing to Moisture: Humidity is a meringue’s worst enemy. On humid days, consider using a dehumidifier in the kitchen or making the pavlova at a time when the weather forecast is favorable.
-
Skipping the Cooling Step: Failing to cool the pavlova properly can result in a collapsed dessert. Cooling gradually in the oven is non-negotiable for maintaining structure.
Avoiding these mistakes will help ensure your pavlova is the star of the show, both in taste and presentation.
Frequently Asked Questions About Pavlova
Why is my pavlova sticky?
A sticky pavlova surface is usually due to humidity. The meringue absorbs moisture from the air, which can lead to stickiness. It’s best to make and store pavlova in a dry environment.
Can I make pavlova in advance?
Yes, you can make the meringue base up to 2 days in advance. Store it in an airtight container at room temperature and add toppings right before serving to maintain its texture.
What can I do if my meringue doesn’t stiffen?
If your meringue doesn’t stiffen, it could be due to grease or residue in the mixing bowl or on the beaters. Always ensure they’re thoroughly clean and free of any fat before use.
How do you know when pavlova is done baking?
A pavlova is done when it lifts easily from the parchment paper and the shell feels dry and firm. The inside should remain marshmallowy and soft.
Can I freeze pavlova?
Freezing the meringue base is not recommended because it can become soft and lose its texture. It’s best enjoyed fresh.
Conclusion: Perfecting Your Pavlova
Perfecting the art of making pavlova involves practice and a bit of patience, but the results are undeniably worth it. By focusing on the key elements—from fresh ingredients and beating techniques to baking time and topping choices—you can create a dessert that is both satisfying and impressive. Whether sticking to traditional flavors or venturing into creative territories, mastering pavlova allows you to mix culinary skill with artistic flair. So gather your ingredients, follow our guide, and reward yourself with a pavlova that will enchant every guest at the table.
References
- Smith, A. (2020). The Art of Pavlova: Delicate and Delicious. Culinary Press.
- Johnson, L. (2019). Baking Essentials: From Meringues to Macarons. Ovenlight Publishers.
- McKay, J. (2021). International Desserts: A Journey Through Sweet Traditions. Global Flavors Books.