
Introduction to Pavlovas and Their Origin
There’s something undeniably captivating about a perfectly crafted pavlova. With its crisp, delicate meringue exterior and soft, marshmallow-like interior, topped with a bounty of fresh fruits and rich cream, a pavlova can truly transform any gathering into an elegant affair. Whether you’re hosting a casual summer brunch, a formal dinner party, or simply want to impress your guests with a stunning dessert, learning how to make pavlovas that shine is a worthy culinary pursuit.
Pavlova’s origins are as fascinating as its delightful taste. Named after the Russian ballerina Anna Pavlova, it is widely believed to have been created in her honor during the 1920s. Both Australia and New Zealand claim to be the birthplace of this delectable dessert, which was purportedly concocted following her tour of the region. Regardless of its origins, the pavlova remains a beloved dish, celebrated for its unique combination of textures and flavors.
With its historic ties and its luxurious aesthetic, a pavlova is not only a dessert but a conversation piece. However, creating a pavlova that truly impresses requires attention to detail and a bit of finesse. From choosing the right ingredients to perfecting your technique and presenting it with an artistic flair, every step is crucial in making your pavlova stand out.
Throughout this article, we’ll guide you through the process of crafting a pavlova that not only impresses with its looks but also delights with its taste. Whether you’re a seasoned baker or a novice in the kitchen, this comprehensive guide will help you master the art of making pavlovas.
Essential Ingredients for a Perfect Pavlova
Crafting the ideal pavlova starts with gathering the right ingredients. Each component plays a crucial role in achieving that signature texture and flavor balance between the meringue base and the toppings.
Egg Whites: The foundation of any pavlova is high-quality egg whites. Fresh, room-temperature eggs are preferable as they whip to a greater volume. Make sure there is no yolk contamination, as even a trace can prevent the egg whites from reaching their full potential.
Caster Sugar: This superfine sugar is essential for the meringue as it dissolves more readily than regular granulated sugar, leading to a smoother texture. Adding the sugar gradually while whipping the egg whites ensures it is fully integrated, avoiding a grainy meringue.
Acid and Starch: To stabilize the egg whites and give your pavlova its characteristic marshmallow center, you’ll need an acid, like vinegar or lemon juice, and a starch, most commonly cornstarch. These ingredients prevent the pavlova from collapsing and help maintain the desired soft interior.
Here’s a quick overview of these key ingredients in a table format:
| Ingredient | Purpose | Quantity (for 1 pavlova) | Alternative Options |
|---|---|---|---|
| Egg Whites | Structure and volume | 4 large egg whites | Pasteurized egg whites |
| Caster Sugar | Sweetness and texture | 1 cup (200g) | Superfine granulated |
| Vinegar/Lemon | Stabilization | 1 tsp | Cream of tartar |
| Cornstarch | Moisture retention | 2 tsp | Arrowroot powder |
Step-by-Step Guide to Making the Meringue Base
The meringue base is the soul of a pavlova. Follow these steps to ensure you get it perfect every time.
-
Prepare Your Equipment: Start with a clean, dry mixing bowl and beaters. Even a small amount of grease or residue can ruin your meringue. Use stainless steel or glass bowls rather than plastic, which can harbor oils.
-
Beat the Egg Whites: Place the egg whites in the mixing bowl and whip them at medium speed until soft peaks form. As air incorporates into the whites, you’ll see them expand in volume and begin to hold shape.
-
Incorporate the Sugar: Gradually add the caster sugar, just a tablespoon at a time, allowing it to dissolve before adding more. This slow addition helps prevent the meringue from deflating and ensures a glossy finish.
Once all the sugar is in, increase the mixer speed to high and whip until the meringue is stiff and shiny. Test by rubbing a small amount between your fingers; if you feel any sugar grains, keep beating.
Tips for Achieving the Best Pavlova Texture
A successful pavlova should be crispy on the outside and soft within. Achieving this requires some attention to detail.
-
Cool the Pavlova in the Oven: Once the baking is done, let the meringue cool in the oven with the door ajar to prevent sudden temperature changes that might cause cracks.
-
Humidity Matters: Avoid making pavlovas on particularly humid days, as moisture can prevent the meringue from crisping up. Alternatively, use a dehydrator setting if your oven supports it.
-
Balance Ingredients: Ensure the correct ratios of egg whites, sugar, acid, and starch. An imbalance can affect texture, making it either too chewy or too dry.
How to Bake and Cool the Pavlova Correctly
Precision in baking and cooling is pivotal for a pavlova that impresses. Here’s a step-by-step guide:
-
Preheat Your Oven: Set your oven to a slow bake at 250°F (120°C). A slower bake allows the meringue to dry out evenly without browning.
-
Shape Your Meringue: On parchment paper, spread the meringue into a circle about 8 inches in diameter, creating a slight depression in the center for the toppings. Use a spatula to achieve a smooth edge or leave it rough for a more rustic look.
-
Bake with Patience: Bake the pavlova for 1 to 1.5 hours. Avoid opening the oven during this time to maintain a stable temperature, which is vital to achieving the perfect texture.
After baking, turn off the oven and let the pavlova cool completely inside. This step prevents cracks and helps it develop its crispy crust.
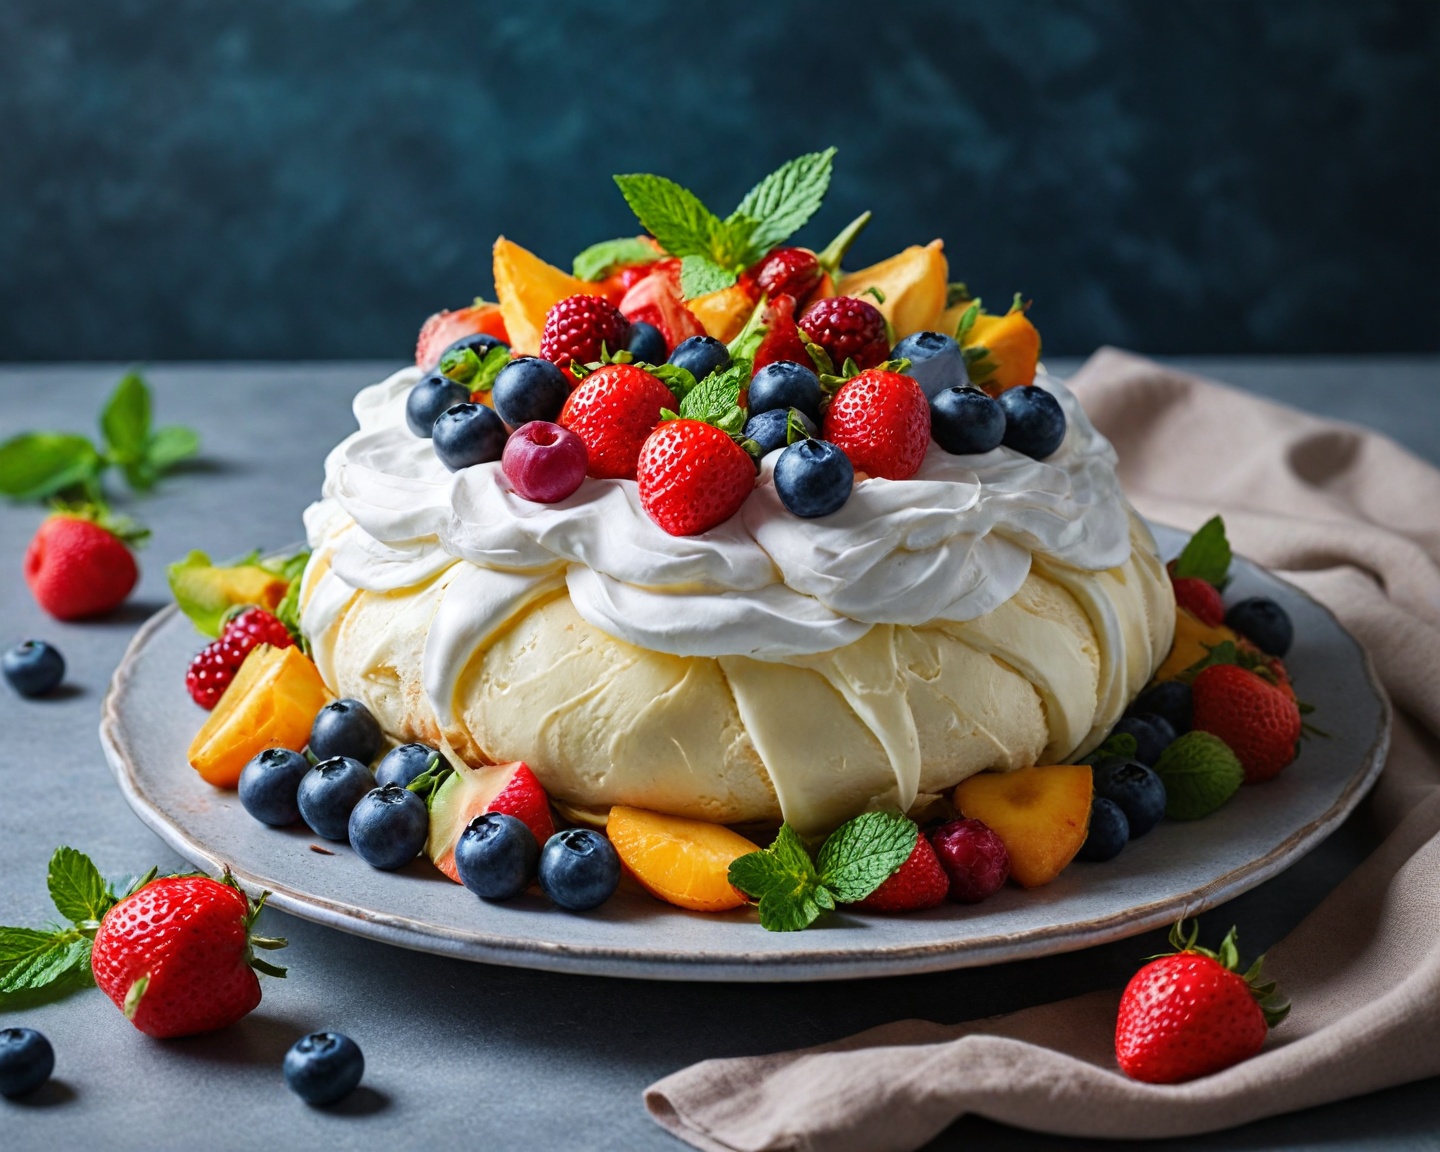
Creative Ideas for Topping Your Pavlova
The versatility of pavlova allows for a near-endless array of topping options. Here are some ideas to get your creative juices flowing:
-
Fruit Medley: Traditional toppings include strawberries, passionfruit, and kiwis. However, you can try raspberries, blueberries, or even tropical fruits like mango and pineapple.
-
Decadent Touches: For a richer experience, drizzle chocolate ganache or salted caramel over the fruits. A sprinkle of toasted nuts like almonds or hazelnuts adds crunch.
-
Seasonal Spin: Reflect the season by choosing the appropriate fruits and garnishes. For autumn, consider spiced apples or pears, while summer might call for a citrus twist or fresh berries.
How to Assemble and Serve a Stunning Pavlova
Assembling your pavlova is all about showcasing its sculptural beauty. To assemble:
-
Prepare Your Cream: Whip heavy cream until soft peaks form. You can sweeten it subtly with sugar or vanilla extract, but remember, less is more.
-
Layer Thoughtfully: Spoon the cream over the cooled pavlova base, carefully spreading it into an even layer. Be gentle to avoid cracking the delicate shell.
-
Arrange Artfully: Place your chosen fruits over the cream, letting them cascade naturally. Use colors and textures that complement each other to make your pavlova visually striking.
When ready to serve, slice carefully with a sharp knife, so the layers remain intact, and present it with a flourish for maximum impact.
Common Mistakes to Avoid When Making Pavlovas
Several common pitfalls can be avoided with a bit of knowledge and preparation:
-
Overbeating the Whites: Stop beating once stiff peaks form. Overbeating can lead to a dry pavlova.
-
Undissolved Sugar: Make sure all sugar is dissolved while beating. Grainy meringue is unpleasant.
-
Rapid Cooling: Never remove a pavlova from the oven without a cooling-down period. Sudden temperature changes lead to cracks and deflation.
Recognizing these issues ahead of time can help you produce a pavlova that displays your culinary skills.
FAQ Section
How long can I store a pavlova, and where is the best place to keep it?
Pavlova can be stored for up to two days in a cool, dry place. Avoid refrigeration before serving as it can absorb moisture and lose its crispness.
Can I make the meringue ahead of time?
Yes, you can make the meringue base a day in advance. Keep it airtight and add toppings just before serving to maintain its texture.
What do I do if my meringue cracks in the oven?
Cracks often result from rapid temperature changes. If this happens, cover any imperfections with cream and fruit. It’ll still taste delicious!
Should I use a metal or glass bowl for whipping egg whites?
Always use a metal or glass bowl, as plastic bowls can contain residual oils that affect how the whites whip.
Can I use baking powder instead of cornstarch?
No, baking powder alters the texture. Opt for cornstarch or arrowroot powder, which help maintain that marshmallow center.
Is it possible to fix overbeaten egg whites?
It’s difficult to recover overbeaten whites. If they start to look grainy, begin again with fresh eggs.
What’s a good substitute for caster sugar?
Blend granulated sugar until finely ground if caster sugar isn’t available. Avoid powdered sugar due to additives that can affect structure.
Can I use flavored extracts?
Yes, but use sparingly to avoid overpowering the pavlova’s delicate flavor. Vanilla is a classic choice.
Recap
Creating an impressive pavlova involves mastering both technique and creativity. By choosing the right ingredients and precisely controlling the cooking process, you can achieve the ideal meringue texture. Once topped with a selection of fresh, vibrant fruits and rich cream, your pavlova is ready to delight any table. Avoiding common mistakes will ensure you craft a dessert that’s not only visually appealing but also a treat for the palate.
References
- Baker, E. (2023). The Ultimate Guide to Meringues. Culinary Press.
- Smith, R. (2023). Baking Basics: Meringue and Its Variations. Pastry People Monthly.
- Johnson, A. (2022). Pavlova Passion: History and Recipes. Sweet Tooth Books.