
Introduction to Flan and Its Origins
Flan, a creamy delight that’s as smooth as silk and as sweet as a kiss, has enchanted taste buds across cultures for centuries. Its rich, caramel-laden surface invites you to indulge in its soft, custardy depths, making it a favorite at dessert tables all around the globe. Originating from ancient Rome, where it’s believed to have been invented with the ample supply of eggs due to domesticated fowl, flan has evolved into various forms to suit the palates of different regions.
The Romans initially enjoyed a savory version of flan, often made with eel, which may sound less appetizing to modern diners. However, the sweet version we know and love today can be traced back to the Middle Ages. During this time, it became a staple in Spain and other European countries. Over time, it traveled with explorers to the New World, adapting to local ingredients and tastes, particularly in Latin American countries where its popularity blossomed.
Flan’s adaptability and delightful blend of textures and flavors make it a cherished treat. From the smooth, sweet custard layer to the rich, slightly bitter caramel topping, each bite delivers a harmonious balance that is both satisfying and refreshing. Making flan at home has become a beloved pastime for dessert enthusiasts, allowing for endless creativity while preserving an age-old dessert tradition.
As you prepare to embark on your own flan-making journey, you’ll find that crafting this luscious dessert is simpler than it appears. With the right ingredients, patience, and a few tips and tricks up your sleeve, you too can learn how to make flan easily at home and impress your family and friends with your culinary prowess.
Listing Essential Ingredients for Flan
Creating a classic flan requires just a handful of essential ingredients that you probably already have in your kitchen. The simplicity of these ingredients is what makes flan a go-to dessert for many home cooks, both beginner and experienced. Here’s a list of what you’ll need to get started:
-
Eggs – The backbone of flan’s creamy custard, you’ll need about five to six large eggs. They provide structure and richness to the dessert.
-
Milk – Traditionally, whole milk is used for flan, but you can experiment with half-and-half or a combination of whole milk and cream for a richer taste. Approximately two cups are needed.
-
Sugar – A cup of granulated sugar for the caramel and an additional half cup for the custard will suffice. Adjust the sweetness to your preference.
-
Vanilla Extract – For that enchanting aroma and flavor, one teaspoon of vanilla extract will elevate your flan to a divine treat.
-
Salt – Just a pinch to balance the sweetness and enhance flavors.
You can also choose to add a few optional ingredients to customize your flan. For example, a dash of cinnamon for warmth, a splash of rum for depth, or even some citrus zest for a refreshing twist. The beauty of flan lies in its versatility, allowing you to tailor it to your liking.
Here’s a quick glance at the primary ingredients:
| Ingredient | Amount | Purpose |
|---|---|---|
| Eggs | 5-6 large | Provides structure |
| Whole Milk | 2 cups | Creamy base |
| Sugar | 1½ cups | Sweetness and caramel |
| Vanilla Extract | 1 teaspoon | Flavor enhancement |
These essential ingredients come together to create the magic that is flan, a luscious dessert that is rich yet light as air.
Preparing the Caramel Base
The caramel base is what gives flan its signature look and flavor — that golden, glistening layer that crowns the top of the dessert. Preparing caramel might seem intimidating at first, but with a bit of patience and practice, it becomes an easy and rewarding process.
Begin by placing one cup of granulated sugar into a heavy-bottomed saucepan. Turn the heat to medium and let the sugar slowly melt. As tempting as it might be, avoid stirring the sugar at this stage. Instead, allow it to melt gently, occasionally swirling the pan to ensure even melting. This method helps prevent crystallization and ensures a smooth caramel.
Watch closely as the sugar turns from clear to a pale amber to a rich golden brown. Timing is key here; remove the pan from heat once you achieve the desired color. Be careful not to let the sugar burn, as burnt caramel turns bitter quickly. Once removed from heat, immediately pour the caramel into the bottom of your chosen mold or ramekin and tilt it to evenly coat the base. The caramel will harden quickly, so work swiftly.
If you’re new to making caramel, here are three quick tips:
- Avoid Stirring: Stirring can cause the sugar to crystallize; use gentle swirling instead.
- Use a Stainless-Steel Pan: It’s easier to judge the color of the caramel in a stainless-steel pan.
- Act Fast: The caramel sets quickly, so pour it into your molds as soon as it’s ready.
Getting the caramel right is a gratifying start to making flan. With these few steps, you’ll have a sweet, slightly bitter layer that perfectly complements the creamy custard.
Mixing the Custard for Flan
With the caramel base setting in your mold, the focus shifts to preparing the custard, the heart of flan. The custard is where the magic happens, where flavors mingle with creamy textures to create a delightful dessert experience.
Begin by cracking five to six large eggs into a mixing bowl. Whisk them gently, avoiding creating too many air bubbles, which can lead to an undesired texture in your flan. In a separate saucepan, combine two cups of whole milk with half a cup of sugar and warm it up over low heat. Stir until the sugar dissolves completely, then remove from heat and allow the milk to cool slightly.
Incorporate the milk mixture gradually into the beaten eggs, stirring constantly to prevent the eggs from cooking. Once well combined, stir in a teaspoon of vanilla extract and a pinch of salt. This step ensures that all flavors meld together beautifully, creating a rich and balanced custard.
For those looking to add a bit of extra flavor, consider the following additions:
- Cinnamon or Nutmeg: Add a dash of either for warmth.
- Citrus Zest: Lemon or orange zest can add a vibrant note.
- Rum or Amaretto: A tablespoon adds complexity and depth.
This custard mixture is now ready to meet its caramel base, setting the stage for the next step in making a perfect flan.
Combining Caramel and Custard
With both the caramel and custard prepared, the time has come to bring them together, crafting the quintessential harmony of flavors and textures that define flan. Carefully pour the custard mixture over the hardened caramel in your mold. As you pour, aim for a slow, steady stream to prevent disturbing the caramel.
Using a fine sieve or strainer can make pouring the custard more refined. It catches any large egg pieces or bubbles, ensuring a silky smooth texture. Finish with a gentle tap of the mold on your counter to release trapped air bubbles within the custard.
For additional assurance of texture and flavor distribution, consider these methods:
-
Bain-Marie Technique: Place your mold in a larger baking pan, and pour hot water around it until it reaches halfway up the sides of the mold. This water bath technique provides a gentle and even cooking environment for the flan.
-
Cover with Foil: During cooking, tent a piece of aluminum foil over the mold. This step helps prevent the top of the custard from browning too much.
-
Monitor Gently: Keep an eye on the water level of your bain-marie; you may need to add more hot water if it evaporates during cooking.
Combining the lusciousness of custard with the deep, tantalizing layer of caramel is the crux of your flan-making adventure. As the custard sits atop the caramel base, it forms a coalition that transforms into a singular dessert masterpiece upon cooking.
Cooking Methods: Oven vs. Stovetop
Choosing how to cook your flan is an important step. While traditional methods focus on baking, there are several options available to ensure your dessert comes out perfectly every time, whether you prefer using the oven or a stovetop.
Oven Baking
Baking flan in the oven is a tried-and-true method that yields consistently excellent results. Once your custard is in the baking dish with the caramel base, preheat your oven to 325°F (160°C). Place the dish in a larger pan and fill it with boiling water to create a bain-marie, as described earlier. Baking typically takes 50 to 60 minutes.
Advantages of oven baking include:
- Even Cooking: The oven ensures uniform heat distribution, resulting in a consistent texture throughout.
- Hands-Off Approach: Once in the oven, you need only to check flan’s doneness toward the end, making it a relatively simple process.
Stovetop Method
For a quicker alternative, consider using a stovetop method, steaming the flan within a pot or a pressure cooker. This option shortens the cooking time significantly.
- Steaming: Place the mold in a steaming basket over simmering water. Cover with a lid and steam for 30 to 40 minutes, checking it occasionally.
- Pressure Cooking: Reduce cooking time further to about 10 minutes under pressure.
Choosing between oven vs. stovetop can be a matter of personal preference. Both methods deliver creamy flan, but they offer different textures and speed.
Allowing Flan to Set and Cool
The anticipation of savoring your homemade flan is nearly palpable as it comes out of the oven or off the stovetop. However, patience is key, as the dessert must be allowed to set and cool properly to achieve the best flavor and texture.
Once your flan has finished cooking, carefully remove it from the baking water bath or pot, and set it on a cooling rack. Let it cool at room temperature for about an hour. This step allows the flan’s center to firm up and stabilize.
When sufficiently cool to the touch, cover the flan with plastic wrap and place it in the refrigerator for at least four hours, preferably overnight. The chilling time lets the flavors meld and deepens the caramel’s flavor as it seeps into the custard.
Remember these tips for cooling and setting:
- Room Temperature: Never rush the process by placing hot flan directly into the refrigerator.
- Chill for Best Results: Longer chilling times improve flavor and texture.
- Inversion Timing: Flan is best unmolded when completely chilled; otherwise, it risks collapsing or forming cracks.
The period of setting and cooling is your final step before unveiling your flan, ensuring that each slice presents beautifully and tastes deliciously smooth.
Tips for Perfect Flan Texture
Achieving the ideal texture for flan—a silky and smooth custard that cuts cleanly—is both an art and a science. With practice and these helpful tips, you can master the delicacy of flan making.
-
Control the Heat: Low and slow is the mantra here. Whether using an oven or stovetop, consistent low heat provides gentle cooking, preventing toughness.
-
Mind the Bain-Marie: Ensure the water in your water bath is hot but not boiling, as too much heat can create bubbles and uneven texture.
-
Egg Quality: Use fresh eggs for the best results since older eggs tend to be more watery.
-
Patience with Mixing: Blend ingredients gently to minimize air bubbles that could disrupt the custard’s smoothness.
-
Check for Doneness: A slight jiggle in the flan’s center is ideal when you tap the mold. Overcooking can result in a firm, rubbery texture.
Implementing these tips can transform a good flan into a great one, leaving a memorable impression on every palate.
Common Mistakes to Avoid
Making flan can seem daunting to beginners, but being aware of common pitfalls can ensure your dessert is both visually and gastronomically perfect. Here are some typical mistakes and how to avoid them:
-
Skipping the Water Bath: Omitting the bain-marie can cause flan to cook unevenly, resulting in a gritty texture.
-
Rushing the Caramel: Hastily prepared caramel often leads to a burnt taste. Take your time with medium heat.
-
Overmixing: Vigorous mixing incorporates too much air, leading to an undesirable bubbly custard.
-
Under or Over Cooking: Keep an eye on the flan during its last cooking stage. Remember, a slight jiggle in the center is perfect.
-
Impatient Unmolding: Unmold flan only after it’s been thoroughly chilled to prevent collapse or cracking.
Avoiding these mistakes is essential for mastering the art of flan making. Each error offers a learning experience, helping you achieve flan superiority.
Serving Suggestions and Variations
Unmolding and serving your flan is a joyful moment that reveals the culmination of your culinary efforts. To ensure that your flan shines as the centerpiece of your dessert table, here are a few serving suggestions and variations to consider.
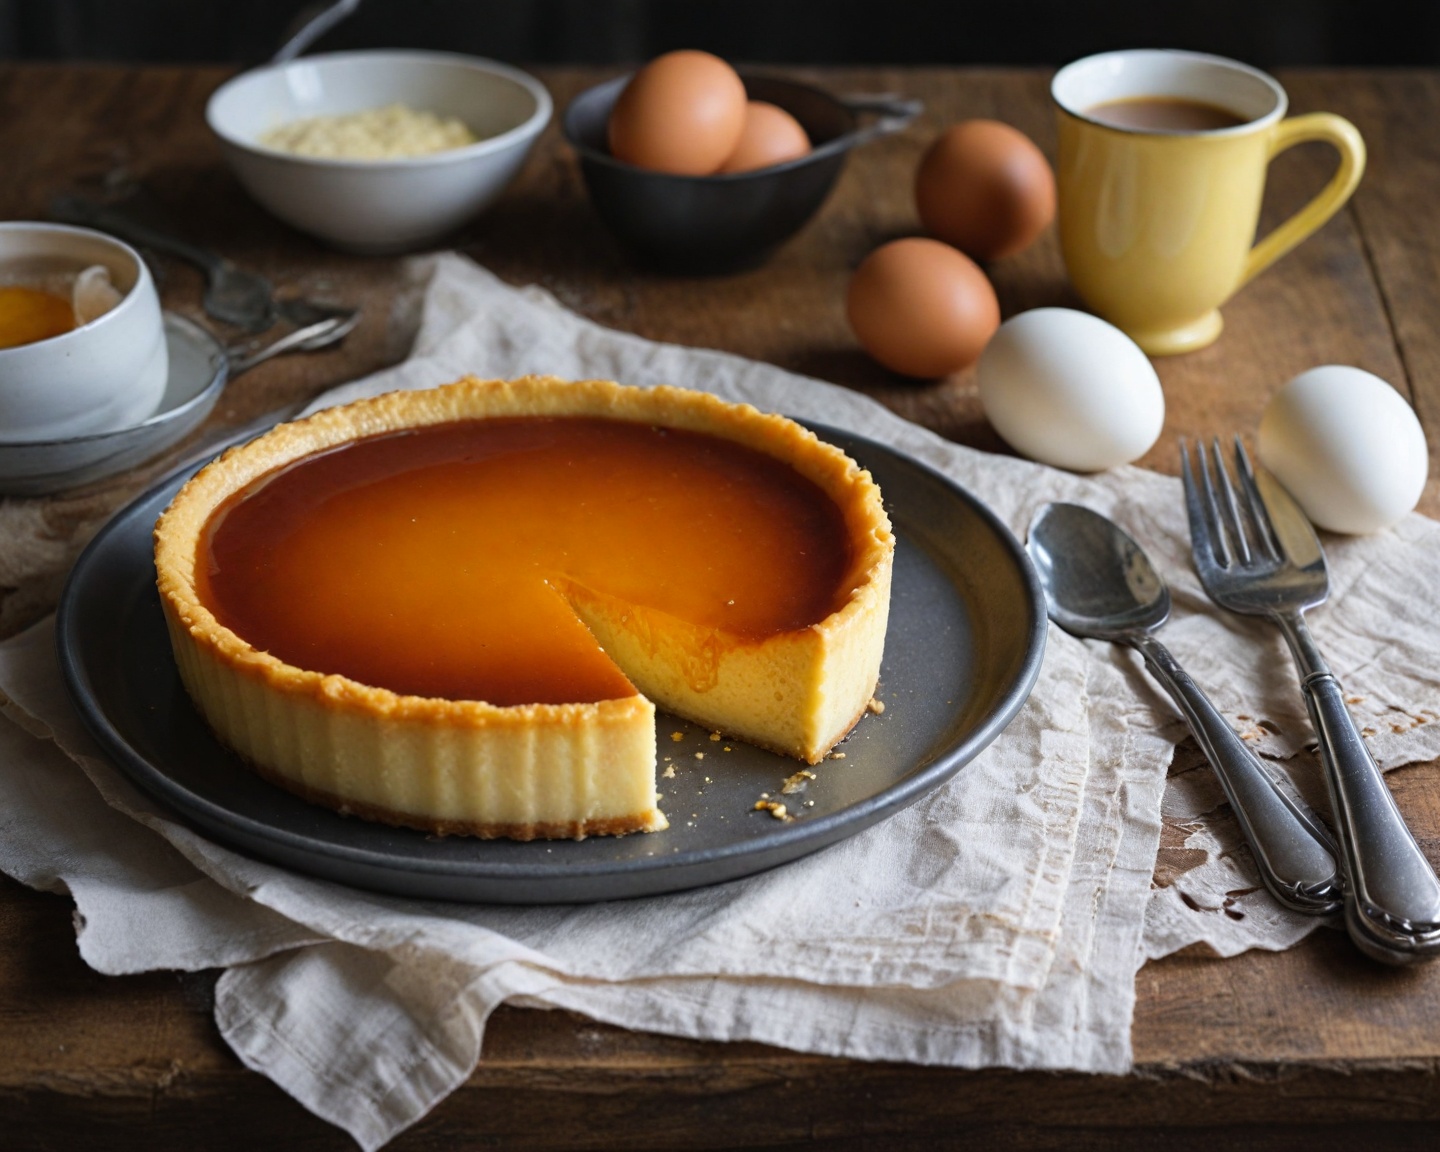
After the cooling period, gently run a knife around the edge of the mold. Place a large plate over the top, and swiftly invert it in one confident motion. The flan should release with a satisfying slick sound as the caramel sauce cascades over the custard.
Serving Ideas
- Tropical Topper: Garnish with fresh slices of mango or pineapple for a tropical flair.
- Berry Burst: Enhance the creamy texture with a scattering of raspberries or blueberries.
- Nut Finish: Add a subtle crunch by sprinkling toasted almonds or hazelnuts on top.
Flavor Variations
- Chocolate Flan: Incorporate melted chocolate into the custard for a decadent twist.
- Coffee Flan: Dissolve instant coffee granules in the milk for a mocha-like flavor.
- Coconut Flan: Substitute part of the milk with coconut milk for an exotic taste.
Explore these variations to bring new dimensions to your flan, whether you prefer the classic or are seeking something more adventurous.
FAQs
How long should flan set before serving?
Flan should set in the refrigerator for at least four hours, but it’s best left overnight to ensure optimal texture and flavor development.
Can I make flan using low-fat milk?
While you can use low-fat milk, keep in mind that full-fat milk lends the flan its creamy, rich texture. Lower fat options might result in a slightly less luxurious custard.
What causes flan to have bubbles or a gritty texture?
Flan can develop bubbles or a grainy texture if it’s overcooked or if the custard mixture was mixed too vigorously, incorporating excess air.
Is it possible to fix caramel that has hardened before pouring?
If your caramel hardens before pouring, rewarm it gently on the stove until it becomes liquid again, taking care not to overcook it and cause burning.
Can I use a sugar substitute for making flan caramel?
Sugar substitutes often don’t caramelize well due to different chemical structures. If you need a substitute for health reasons, look for caramel-flavored alternatives tailored for cooking.
Recap
You now have the complete skill set at your fingertips to learn how to make flan easily at home. We’ve uncovered the origins of this timeless dessert, identified its core ingredients, and navigated through each stage of crafting the delicate caramel and custard. We’ve compared cooking methods, strategized setting times, and divulged expert tips and common mistakes. Offering variations and serving ideas sparks creativity, ensuring your flan captivates every time. With practice, patience, and persistence, you’re ready to embrace the flan challenge and win.
References
- “A Brief History of Flan.” The Dessert History Project. https://www.desserthistoryproject.com/flan-history
- “Mastering Caramel: Tips and Tricks.” Sugar Chemistry. https://www.sugarchemistry.com/caramel-tips
- “Traditional Flan Recipes.” The Culinary Heritage. https://www.culinaryheritage.com/flan-recipes